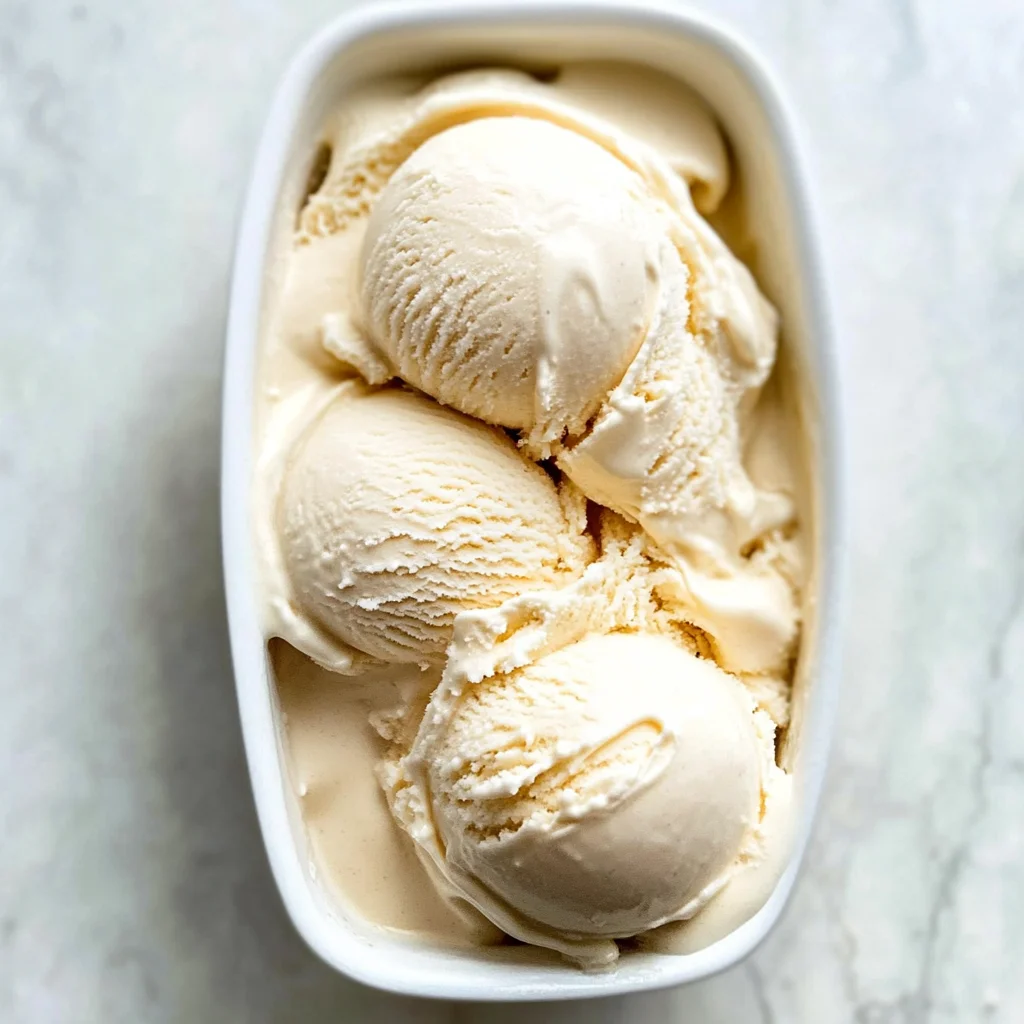
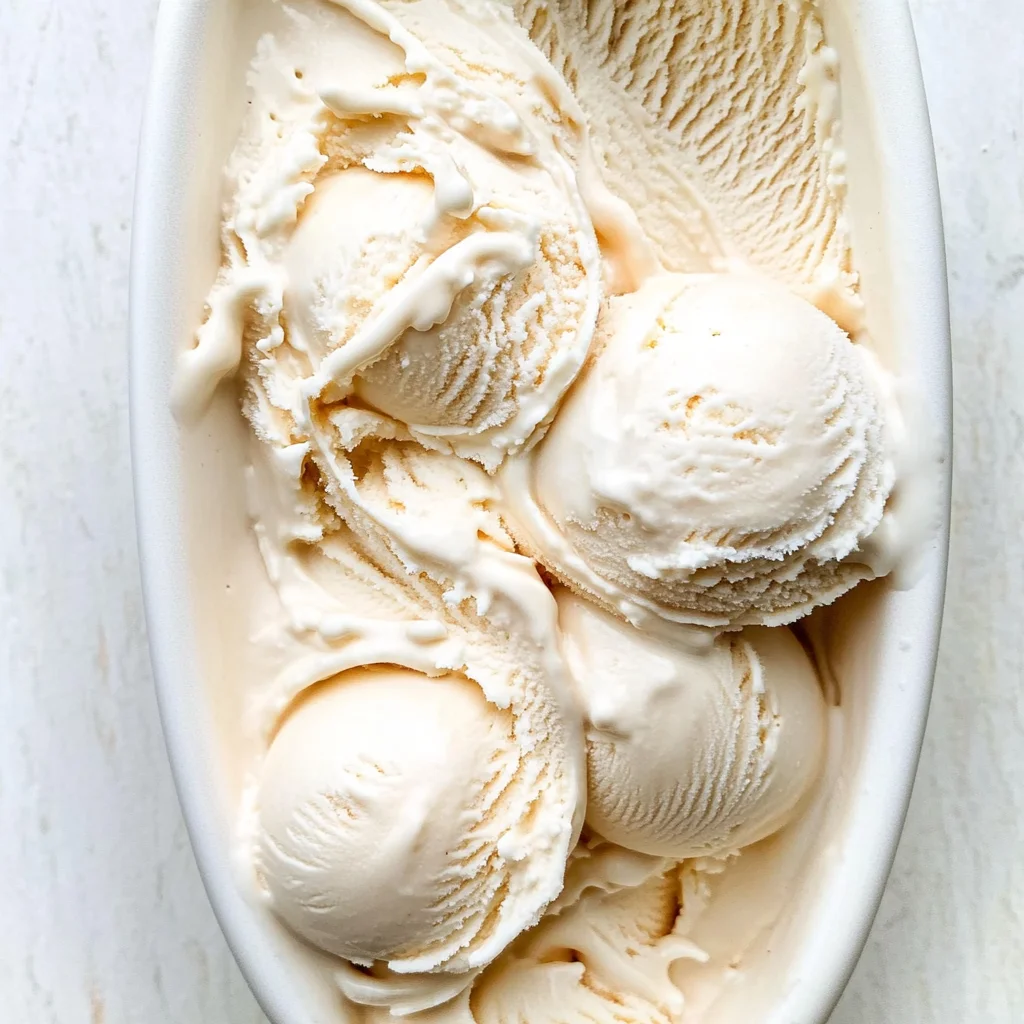
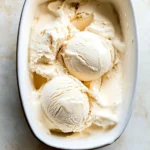
Sugar Free Vanilla Ice Cream
Sugar Free Vanilla Ice Cream is a delightful dessert that anyone can enjoy. This easy recipe uses only five simple ingredients and requires no churning or eggs, making it perfect for warm days and special occasions. With its creamy texture and rich flavor, this sugar-free treat will satisfy your sweet cravings without the added sugar.
Why You’ll Love This Recipe
- Simple Preparation: With just a few minutes of mixing, you can create a delicious ice cream that sets perfectly in the freezer.
- Rich Flavor: The combination of heavy whipping cream and vanilla creates a creamy, indulgent taste that rivals traditional ice creams.
- Healthier Alternative: Enjoy dessert without the guilt! This recipe uses a sugar alternative, making it suitable for those watching their sugar intake.
- Versatile Treat: Serve it as is or use it as a base for your favorite toppings like fresh fruit or nuts.
- Egg-Free Delight: Perfect for those who prefer eggless desserts, this ice cream meets many dietary needs without compromising on flavor.
Tools and Preparation
Having the right tools makes all the difference when preparing your Sugar Free Vanilla Ice Cream. Here’s what you’ll need to get started.
Essential Tools and Equipment
- Mixing bowl
- Electric mixer
- Loaf pan
- Rubber spatula
- Measuring cups and spoons
Importance of Each Tool
- Mixing bowl: A large mixing bowl allows enough space to blend ingredients thoroughly.
- Electric mixer: Using an electric mixer saves time and ensures the mixture becomes fluffy and well-combined.
- Rubber spatula: Perfect for transferring and smoothing out the mixture in your loaf pan without wasting any delicious ice cream.
Ingredients
Sugar Free Vanilla Ice Cream requires just five key ingredients:
For the Base
- 2 cups Heavy Whipping Cream (–cold)
- ¾ cup Sugar Alternative
- 1 cup Milk (–cold)
- 2 tsp Vanilla Extract
- ½ tsp Sea Salt
How to Make Sugar Free Vanilla Ice Cream
Step 1: Combine Ingredients
In a large mixing bowl, beat together all of the ingredients on low until combined and thick, which should take about five minutes.
Step 2: Transfer Mixture
Transfer the mixed ingredients to your loaf pan. Use the backside of a spoon or rubber spatula to smooth out the top of the ice cream evenly.
Step 3: Freeze Until Set
Cover the loaf pan with plastic wrap or a lid. Place it in the freezer and let it set for about six hours or until firm.
Enjoy your homemade Sugar Free Vanilla Ice Cream as a delightful dessert or refreshing snack!
How to Serve Sugar Free Vanilla Ice Cream
Serving Sugar Free Vanilla Ice Cream can be a delightful experience. Its creamy texture and sweet flavor allow for various presentation ideas that enhance the enjoyment of this simple dessert.
Classic Scoop
- Serve a generous scoop in a chilled bowl for a traditional approach, allowing the ice cream’s flavors to shine.
Topped with Fresh Berries
- Add a handful of fresh strawberries, blueberries, or raspberries on top. The tartness of the berries complements the sweetness of the ice cream beautifully.
Drizzled with Chocolate Sauce
- A drizzle of sugar-free chocolate sauce can elevate your ice cream to gourmet status. Choose a sauce that is low in carbs for an even better option.
Served in a Waffle Cone
- For a fun twist, serve the ice cream in a sugar-free waffle cone. This adds a crunchy texture that contrasts perfectly with the creamy ice cream.
Paired with Nuts
- Sprinkle some chopped nuts like almonds or pecans on top for an added crunch and healthy fats.
How to Perfect Sugar Free Vanilla Ice Cream
Perfecting your Sugar Free Vanilla Ice Cream can take your dessert to the next level. Follow these tips for an even creamier and more delicious treat.
-
Use cold ingredients: Ensure that both your heavy whipping cream and milk are very cold before mixing. This helps the ice cream whip up better and results in a smoother texture.
-
Mix thoroughly: Make sure to beat your mixture well until thickened but avoid over-mixing, which can lead to icy textures.
-
Cover properly: When storing in the freezer, cover the ice cream tightly with plastic wrap before putting on the lid. This prevents ice crystals from forming.
-
Experiment with flavors: Feel free to add other flavorings like almond extract or coffee for variety while keeping it sugar-free.
-
Let it sit before serving: Allow your ice cream to sit at room temperature for about 5 minutes before scooping. This makes it easier to serve without losing its shape.
Best Side Dishes for Sugar Free Vanilla Ice Cream
Pairing side dishes with your Sugar Free Vanilla Ice Cream can create an exciting dessert experience. Here are some great options to consider:
-
Fresh Fruit Salad: A mix of seasonal fruits adds natural sweetness and freshness alongside the creamy ice cream.
-
Chia Seed Pudding: This pudding offers a nutritious and filling contrast to your sweet treat; make it using almond milk and maple syrup for sweetness.
-
Granola Clusters: Crunchy granola clusters provide texture and are perfect for sprinkling on top of your ice cream.
-
Coconut Whipped Cream: A dollop of coconut whipped cream adds richness and pairs deliciously with vanilla flavors.
-
Almond Butter Cookies: These cookies are gluten-free and add a chewy texture that complements the soft ice cream.
-
Chocolate Avocado Mousse: This creamy mousse is rich in healthy fats and pairs surprisingly well with vanilla ice cream, creating a decadent combination.
-
Baked Apples: Warm baked apples sprinkled with cinnamon make an excellent warm topping when served over cold ice cream.
-
Dark Chocolate Bark: Break into pieces for a crispy side; dark chocolate bark is rich, satisfying, and ideal alongside sweet flavors.
Common Mistakes to Avoid
Making Sugar Free Vanilla Ice Cream can be simple, but a few common mistakes can ruin your dessert. Here are some pitfalls to avoid:
- Using warm ingredients: Always ensure that your heavy cream and milk are cold. Warm ingredients can prevent the ice cream from thickening properly.
- Overmixing: While it’s important to combine the ingredients, overmixing can introduce air bubbles that affect the texture. Mix just until combined and thickened.
- Skipping the freezing step: Do not skip freezing for at least six hours. This is crucial for achieving that creamy ice cream texture.
- Not using a sugar alternative suited for freezing: Some sugar substitutes do not freeze well. Select a suitable sugar alternative that maintains texture when frozen.
- Ignoring salt: A small amount of sea salt enhances the flavors in your ice cream. Don’t overlook this simple yet essential ingredient.
Storage & Reheating Instructions
Refrigerator Storage
- Store in an airtight container for up to 2 days if you plan to consume it soon.
- Keep away from strong-smelling foods to maintain the ice cream’s flavor.
Freezing Sugar Free Vanilla Ice Cream
- For best results, keep it in the freezer for up to 2 months.
- Use a sturdy container with a tight lid to prevent freezer burn.
Reheating Sugar Free Vanilla Ice Cream
- Oven: Preheat to 350°F (175°C) and place the ice cream in an oven-safe dish for about 10 minutes.
- Microwave: Heat in short bursts of 10-15 seconds until softened. Stir between intervals.
- Stovetop: Place in a saucepan over low heat, stirring constantly until warmed.
Frequently Asked Questions
What is Sugar Free Vanilla Ice Cream made of?
Sugar Free Vanilla Ice Cream is made with heavy whipping cream, milk, a sugar alternative, vanilla extract, and sea salt.
How long does it take to make Sugar Free Vanilla Ice Cream?
The preparation time is about 10 minutes, but you need to freeze it for approximately six hours before serving.
Can I customize my Sugar Free Vanilla Ice Cream?
Yes! You can add mix-ins like nuts or fruits after mixing the base, or swirl in some sugar-free chocolate sauce before freezing.
Is Sugar Free Vanilla Ice Cream suitable for diabetics?
Absolutely! This recipe uses a sugar alternative, making it a great option for those looking to reduce their sugar intake.
Final Thoughts
Sugar Free Vanilla Ice Cream is an easy-to-make dessert that satisfies your sweet cravings without added sugars. Its creamy texture makes it versatile—perfect on its own or as a base for creative toppings. Feel free to customize it with your favorite add-ins!
Sugar Free Vanilla Ice Cream
Indulge in the creamy delight of Sugar Free Vanilla Ice Cream, a guilt-free dessert that satisfies your sweet tooth without any added sugars. This easy-to-follow recipe requires just five simple ingredients and no churning or eggs, making it perfect for warm days or special occasions. With its rich vanilla flavor and smooth texture, you can enjoy this ice cream on its own or customize it with your favorite toppings like fresh fruit or nuts. Whether you’re hosting a gathering or treating yourself to a refreshing snack, this sugar-free treat is sure to impress.
- Prep Time: 10 minutes
- Cook Time: 0 minutes
- Total Time: 10 minutes
- Yield: Approximately 4 servings 1x
- Category: Dessert
- Method: Freezing
- Cuisine: American
Ingredients
- 2 cups Heavy Whipping Cream (cold)
- ¾ cup Sugar Alternative
- 1 cup Milk (cold)
- 2 tsp Vanilla Extract
- ½ tsp Sea Salt
Instructions
- In a large mixing bowl, beat together all ingredients on low speed until combined and thickened, about five minutes.
- Transfer the mixture into a loaf pan and smooth the top with a rubber spatula.
- Cover with plastic wrap or a lid and freeze for approximately six hours until firm.
Nutrition
- Serving Size: ½ cup (120g)
- Calories: 250
- Sugar: 1g
- Sodium: 60mg
- Fat: 24g
- Saturated Fat: 15g
- Unsaturated Fat: 8g
- Trans Fat: 0g
- Carbohydrates: 6g
- Fiber: 0g
- Protein: 3g
- Cholesterol: 80mg